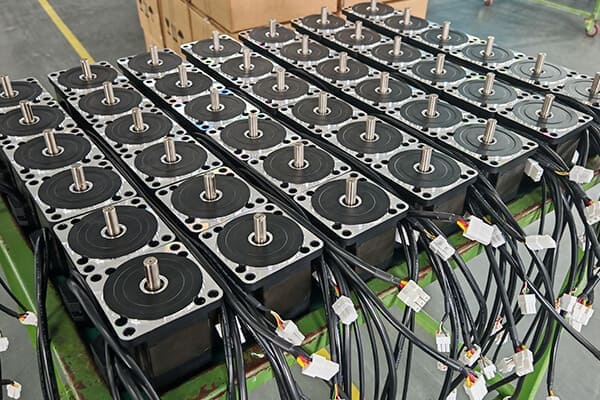
Brushless DC motors (BLDC) are the backbone of modern motion control systems, valued for their efficiency, precision, and durability. However, understanding their wiring and terminal designations is crucial for correct operation. Among the most common and sometimes confusing labels found on BLDC motors are F1 and F2. These terminals are not just arbitrary markings — they play an essential role in motor control, feedback, and performance.
In this comprehensive guide, we will explore what F1 and F2 mean on a BLDC motor, how they function, and why understanding them is vital for proper installation, maintenance, and troubleshooting.
Understanding the Basics of BLDC Motor Terminals
Brushless DC (BLDC) motors have become a cornerstone of modern electromechanical systems, powering everything from industrial automation to electric vehicles and robotics. Their compact design, energy efficiency, and precise control make them superior to traditional brushed motors. However, to properly integrate and operate a BLDC motor, one must understand its terminals and connections — the interface points that enable communication between the motor, controller, and external systems.
In this article, we will break down the essential BLDC motor terminals, explaining their functions, importance, and proper wiring to help you achieve optimal motor performance and longevity.
What Are BLDC Motor Terminals?
BLDC motor terminals are the electrical connection points that allow the controller to supply power and receive signals from the motor. These terminals are carefully labeled to denote their functions — including power supply, control signals, and feedback connections.
Unlike brushed motors that have only two terminals for power, BLDC motors include multiple terminals to handle three-phase excitation and position sensing. Understanding what each terminal does ensures the correct integration of the motor with the electronic speed controller (ESC) or drive circuit.
Main Terminal Categories in BLDC Motors
A standard BLDC motor typically includes several terminal categories, each serving a distinct purpose:
Power Terminals (U, V, W or A, B, C)
Hall Sensor Terminals (H1, H2, H3, +5V, GND)
Auxiliary Terminals (F1, F2 or Brake/Tachometer connections)
Each set of terminals contributes to efficient motor operation and precise control. Let's look at them in detail.
1. Power Terminals – U, V, W (Three-Phase Connections)
The U, V, and W terminals (sometimes labeled A, B, C) are the primary power inputs of a BLDC motor. These three connections correspond to the three stator windings that generate the rotating magnetic field driving the rotor.
The controller delivers pulsating DC voltage to these terminals in a specific sequence.
The electronic commutation replaces the mechanical brushes found in traditional DC motors.
The correct connection sequence ensures smooth rotation and torque generation.
Key Points:
Reversing any two terminals (e.g., swapping U and V) will reverse the motor's rotation direction.
Equal voltage distribution across these terminals is crucial for balanced performance.
The current flowing through these terminals directly influences torque output.
2. Hall Sensor Terminals – H1, H2, H3, +5V, GND
BLDC motors rely on rotor position sensors, commonly known as Hall effect sensors, to achieve accurate commutation. These sensors are vital for synchronizing current supply to the stator coils according to the rotor's position.
Terminal Functions:
H1, H2, H3: Output signals from the three Hall sensors. Each signal represents a digital high (1) or low (0) depending on the rotor's position.
+5V: Provides regulated power to the Hall sensor circuit.
GND: Serves as the return path for sensor power.
The controller reads the sequence of signals from H1, H2, and H3 to determine the exact angular position of the rotor. This allows for precise timing of current switching and ensures smooth and efficient motor operation.
Key Benefits of Hall Sensors:
Enable accurate low-speed control and startup torque.
Allow directional sensing for bidirectional motion.
Support closed-loop speed control when combined with feedback systems.
3. Auxiliary Terminals – F1 and F2
The F1 and F2 terminals are auxiliary connections whose purpose varies depending on motor design. They may serve as terminals for electromagnetic brakes, tachometer feedback, or field excitation.
Common Uses of F1 and F2:
Brake Coil Connection:
In motors with integrated brakes, F1 and F2 connect to the brake coil.
Applying DC voltage to these terminals releases the brake, allowing the motor to rotate.
Removing voltage engages the brake, holding the motor shaft in place.
Tachometer Feedback:
In certain BLDC motors, F1 and F2 are linked to a tachometer generator.
The tachometer produces a voltage proportional to the motor's rotational speed.
This feedback is used for speed regulation in closed-loop control systems.
Field Winding (Rare Case):
Some advanced BLDC motors use electrically excited rotors instead of permanent magnets.
F1 and F2 in this case connect to the field winding, allowing adjustable magnetic field strength.
Understanding F1 and F2 is critical for proper integration with external controllers or braking systems.
Identifying BLDC Motor Terminals
When working with a BLDC motor, it's essential to identify terminals correctly before wiring. Here's how:
Check the Motor Datasheet:
Manufacturers always provide terminal labeling and wiring information.
Visual Inspection:
Labels such as U, V, W, H1, H2, H3, F1, and F2 are often engraved or printed near the terminal block.
Use a Multimeter:
Measure resistance between U, V, and W — all three readings should be equal.
Verify continuity between Hall sensor pins and power pins.
Measure F1–F2 resistance to confirm brake or feedback coil presence.
Observe Controller Response:
If the motor rotates irregularly or vibrates, check the phase and Hall sensor sequence alignment.
Practical Tips for Connecting BLDC Motor Terminals
Always connect U, V, W terminals to the corresponding phase outputs of the BLDC controller.
Ensure that +5V and GND are correctly polarized when connecting Hall sensors.
Use shielded cables for Hall signal lines to reduce electromagnetic interference.
For F1/F2 brake terminals, apply the manufacturer-recommended DC voltage only.
Secure all connections with insulated connectors to prevent accidental short circuits.
Proper terminal connection ensures stable operation, maximum torque efficiency, and longer motor lifespan.
Common Terminal Connection Issues and Solutions
| Issue | Possible Cause | Solution |
| Motor does not start | Incorrect Hall sensor wiring | Verify H1, H2, H3 sequence |
| Motor vibrates or jerks | Wrong phase order (U, V, W) | Swap any two-phase wires |
| Brake does not engage | F1/F2 miswired or damaged brake coil | Measure brake coil resistance |
| Unstable speed control | Feedback (F1/F2 tachometer) error | Check feedback polarity and signal integrity |
Regular inspection and testing prevent such issues and ensure reliable motor performance.
Why Understanding BLDC Motor Terminals Matters
Misinterpreting or misconnecting terminals can cause:
Controller malfunction or damage
Loss of feedback accuracy
Reduced efficiency or torque output
Brake failure and mechanical hazards
By mastering the function of each terminal, engineers can design and maintain BLDC motor systems that deliver smooth motion, high reliability, and energy efficiency.
Understanding the basics of BLDC motor terminals — including power (U, V, W), Hall sensors (H1–H3, +5V, GND), and auxiliary connections (F1, F2) — is fundamental for anyone working with modern electric drives. Each terminal plays a critical role in ensuring the motor's performance, safety, and responsiveness.
Whether you're configuring a robotic actuator, a CNC spindle, or an EV drive system, knowing how to identify, connect, and test BLDC motor terminals is key to unlocking the full potential of brushless technology.
What Do F1 and F2 Represent in a BLDC Motor?
In most BLDC motor configurations, the terminals F1 and F2 are associated with feedback or field connections, which play a key role in regulating the motor's speed, torque, and braking behavior. There are two major interpretations of F1 and F2 in BLDC systems:
1. F1 and F2 as Field or Feedback Terminals
In sensor-based BLDC motors, F1 and F2 often refer to feedback lines connected to the tachometer or encoder circuit that provides speed information to the controller. These terminals allow the drive system to monitor motor performance and adjust the input voltage or current accordingly.
This configuration ensures precise speed control, particularly in servo applications or systems requiring constant speed under varying loads.
2. F1 and F2 as Dynamic Braking Terminals
In some BLDC motors, F1 and F2 serve as the braking terminals, where a brake coil or electromagnetic brake is connected. When DC voltage is applied across F1 and F2, the brake engages, locking the rotor to prevent unwanted motion when power is removed from the drive circuit.
This is particularly common in industrial automation, robotics, and elevator drive systems, where motor position must be held securely when the system is inactive.
BLDC Motor Wiring Diagram with F1 and F2 Explained
A typical BLDC motor wiring layout includes:
Three-phase supply terminals (U, V, W) for stator connection.
Hall sensor terminals (H1, H2, H3, +5V, GND) for rotor position sensing.
F1 and F2 terminals connected to either:
When wiring a BLDC motor:
Identify the motor datasheet or terminal marking chart.
Verify F1/F2 function — whether it's for feedback or brake coil connection.
Ensure proper polarity, as reversing these terminals may cause incorrect feedback readings or brake malfunction.
Distinguishing F1 and F2 in Different BLDC Motor Designs
The meaning of F1 and F2 can vary based on motor construction and application. Below are common configurations:
a. BLDC Motors with Tachometer Feedback
Some BLDC motors integrate a small tachometer generator that produces a voltage proportional to motor speed. In such motors:
F1 and F2 are the output terminals of the tachometer.
The generated signal (typically in millivolts per RPM) is sent to the controller.
This allows the controller to maintain accurate speed control even under fluctuating load conditions.
b. BLDC Motors with Electromagnetic Brakes
For motors equipped with brakes:
The brake coil is connected across F1 and F2.
When voltage is applied, the brake disengages, allowing rotation.
When voltage is removed, the brake engages, holding the shaft in place.
This design is essential in safety-critical systems, preventing unwanted motion during power failures.
c. BLDC Motors with Field Excitation (Rare)
While most BLDC motors use permanent magnets in the rotor, a few specialized types employ electrically excited fields. In such cases:
F1 and F2 function as the field winding terminals.
The field current determines the magnetic flux strength, influencing torque output.
These are typically used in high-power industrial motors where adjustable field control is necessary.
How to Identify F1 and F2 on a BLDC Motor
In Brushless DC (BLDC) motors, correct wiring and terminal identification are crucial to ensure efficient performance and safe operation. Among the terminals found on many BLDC motors, F1 and F2 often create confusion because their function can vary depending on the motor's design and application. In some motors, they are used for feedback or tachometer connections, while in others they serve as electromagnetic brake terminals or field winding leads.
This article provides a comprehensive guide on how to identify F1 and F2 terminals on a BLDC motor, interpret their purpose, and test them safely to ensure accurate wiring and operation.
Understanding the Role of F1 and F2 Terminals
Before identifying the F1 and F2 terminals, it's essential to understand what they represent. In most BLDC motors, these terminals belong to one of the following systems:
Tachometer Feedback Circuit – F1 and F2 connect to a small built-in tachogenerator that outputs voltage proportional to motor speed.
Electromagnetic Brake Coil – F1 and F2 supply voltage to the brake, engaging or releasing it depending on power status.
Field Winding (Excitation System) – Rarely, in specially designed BLDC motors, F1 and F2 provide excitation current to a wound rotor instead of using permanent magnets.
Knowing which system your motor uses is key to identifying and testing F1 and F2 correctly.
Step-by-Step Guide to Identify F1 and F2 on a BLDC motor
Step 1: Check the Motor Nameplate or Datasheet
The first and most reliable source of terminal information is the motor datasheet or nameplate.
Manufacturers usually print or engrave terminal labels such as U, V, W, H1, H2, H3, and F1, F2 either near the connector block or in the documentation.
If the datasheet lists F1 and F2 under brake connections, they are for the brake coil.
If listed as tachometer or feedback output, they belong to a speed sensing circuit.
If labeled under field winding, the motor uses electromagnetic excitation instead of permanent magnets.
Always refer to manufacturer documentation before conducting any electrical tests.
Step 2: Visual Inspection of the Motor
Perform a careful visual check of the terminal block or connector.
Look for engraved or printed labels near each terminal (e.g., F1, F2).
Identify wire colors — some manufacturers use standard color codes (e.g., white and yellow for feedback, black and red for brakes).
Check for a secondary small connector apart from the main U, V, W terminals — this often carries Hall sensors and F1/F2 connections.
If the motor has a small cylindrical attachment or rear housing labeled as a brake or tachogenerator, it is a strong indicator that F1 and F2 are linked to that component.
Step 3: Use a Multimeter to Measure Resistance
The next step is to measure the resistance between the F1 and F2 terminals using a digital multimeter.
If the resistance is low (a few ohms):
If the resistance is moderate (20–200 ohms):
If resistance is variable or infinite:
The circuit may include electronic components such as a sensor amplifier or field winding driver.
In this case, refer to the motor datasheet for precise specifications.
⚠️ Safety Note:
Never apply voltage to unknown terminals before confirming their purpose. Doing so can damage the feedback circuit or brake coil.
Step 4: Measure Output Voltage During Motor Operation
If F1 and F2 are feedback or tachometer terminals, they will generate a small DC voltage when the motor shaft rotates.
Testing Procedure:
Disconnect F1 and F2 from any control circuitry.
Set the multimeter to the DC voltage range.
Rotate the motor shaft manually or run the motor at low speed.
Observe the voltage across F1 and F2.
A steady DC voltage proportional to speed (e.g., 10–50 mV per 100 RPM) indicates a tachometer feedback output.
If no voltage appears, but the motor uses a brake system, these terminals may belong to the brake coil.
Step 5: Apply Low Voltage for Brake Coil Testing
If you suspect F1 and F2 are connected to a brake coil, you can confirm this by applying low DC voltage (below the rated brake voltage, typically 10–24V DC).
Testing Steps:
Secure the motor to prevent movement.
Apply a low DC voltage between F1 and F2.
Observe the motor shaft:
If the shaft unlocks or becomes free, the brake is disengaging — confirming F1 and F2 as brake coil terminals.
If there's no change, either the brake coil is damaged, or F1/F2 serve a different function.
Always start with low voltage and increase gradually to avoid overheating the brake coil.
Step 6: Cross-Check with the Controller
BLDC controllers designed for motors with feedback or brakes usually have designated input/output pins labeled “Tach,” “FB,” or “Brake +/–.”
Connect F1 and F2 to these points only after confirming their purpose. Incorrect connection could lead to:
For best results, consult both the motor and controller documentation for compatible voltage and wiring instructions.
Common Identification Scenarios
| Motor Type | F1 & F2 Function | Typical Resistance | Voltage Type |
| BLDC with feedback generator | Tachometer output | 1–10 Ω | Output voltage proportional to speed |
| BLDC with brake | Brake coil terminals | 20–200 Ω | 12V or 24V DC applied |
| BLDC with wound field rotor | Field excitation terminals | 10–50 Ω | Supplied DC current (adjustable) |
Key Safety and Wiring Tips
Always de-energize the system before testing terminals.
Label wires after identification to prevent future confusion.
Avoid polarity reversal when connecting F1/F2 feedback or brake circuits.
Use a fuse or current limiter when applying test voltage to prevent coil damage.
Document terminal layout in your maintenance log for future reference.
Proper identification and handling of F1 and F2 connections protect both the motor and the control system from avoidable failures.
Troubleshooting F1 and F2-Related Issues
| Symptom | Possible Cause | Recommended Action |
| Brake does not release | Open brake coil or incorrect wiring | Measure resistance, check F1/F2 voltage |
| Motor speed unstable | Tachometer signal polarity reversed | Swap F1 and F2 connections |
| No feedback voltage | Tachometer winding damaged | Test coil continuity and replace if faulty |
| Brake engages intermittently | Loose connection or supply fluctuation | Inspect wiring and stabilize voltage supply |
Effective troubleshooting minimizes downtime and maintains system safety.
Identifying F1 and F2 terminals on a BLDC motor is an essential step in ensuring proper installation, control, and safety. These terminals typically serve one of three purposes — feedback, braking, or field excitation — and their correct identification ensures that your motor operates efficiently and safely.
By following the steps outlined — checking datasheets, inspecting visually, testing resistance and voltage, and cross-referencing with the controller — technicians can confidently determine the role of F1 and F2 in any BLDC system.
Mastering terminal identification not only prevents wiring errors but also extends motor life, enhances performance, and guarantees reliable operation in any industrial or automation application.
Importance of Correct F1 and F2 Connections
Incorrect wiring of F1 and F2 can lead to several issues:
Inaccurate speed feedback, leading to unstable or erratic motor performance.
Brake failure, causing unsafe conditions in mechanical systems.
Damage to control circuits if voltage is applied incorrectly.
Proper identification and connection ensure that the motor operates with maximum efficiency, safety, and reliability.
Practical Applications of F1 and F2 in BLDC Systems
BLDC motors with F1 and F2 terminals are widely used in applications that require precise control and safety interlocks, such as:
CNC machines and robotics: For accurate position control using feedback systems.
Conveyor drives and elevators: For holding torque and braking systems.
Electric vehicles: For speed regulation through tachometer feedback.
Medical equipment: For smooth motion control and precise positioning.
Understanding the specific role of F1 and F2 in these systems enables technicians and engineers to integrate the motor seamlessly into complex automation setups.
Maintenance and Troubleshooting Tips
When servicing a BLDC motor with F1 and F2 connections, follow these guidelines:
Always disconnect power before testing F1/F2 terminals.
Inspect wiring insulation for damage or corrosion.
Test coil resistance periodically to ensure brake or feedback coil integrity.
Use manufacturer-approved voltage levels when energizing brakes.
Document wiring connections before disassembly to avoid confusion during reinstallation.
Regular maintenance of F1/F2 circuits helps prevent performance degradation and costly downtime.
Conclusion
The F1 and F2 terminals on a BLDC motor are critical for either feedback or braking functions, depending on the design. Understanding their purpose allows for correct wiring, efficient control, and enhanced operational safety. Whether they serve as tachometer feedback outputs or electromagnetic brake terminals, proper identification ensures that your BLDC motor performs with precision and reliability in every application.
By mastering the meaning of F1 and F2, technicians and engineers can fully harness the intelligent control capabilities of BLDC technology — ensuring smooth, stable, and secure operation across industries.

 English
 العربية
 Français
 Русский
 Español
 Português
 Deutsch
 italiano
 日本語
日本語 한국어
한국어 Nederlands
 Tiếng Việt
 ไทย
ไทย Polski
 Türkçe
 ພາສາລາວ
 ភាសាខ្មែរ
 Bahasa Melayu
 ဗမာစာ
ဗမာစာ Filipino
 Bahasa Indonesia
 magyar
 Română
 Čeština
 Монгол
 қазақ
қазақ Српски
 हिन्दी
 فارسی
فارسی Slovenčina
 Slovenščina
 Norsk
Norsk Svenska
 українська
 Ελληνικά
 Suomi
Suomi Հայերեն
 עברית
עברית Latine
 Dansk
Dansk Shqip
Shqip বাংলা
বাংলা Hrvatski
 Afrikaans
 Gaeilge
 Eesti keel
 Oʻzbekcha
 latviešu
 Azərbaycan dili
 Български
 Català


